Hey Siri, make coffee!
“my wife was tired of bringing me coffee in bed every morning. But I am too lazy (especially in the morning) to actually get up and make it. Therefore, I automated it.”
My goal was exactly the one described in the first sentence, I needed to automate the first coffee I get in the morning, ‘cause I can’t really do anything if I don’t get otherwise. Since I have a cheap Nespresso machine, it can’t be programmed to do so; therefore I decided to solve it using simple programming and iOS automation.
This is definitely not sci-fi, not even complex programming or electronic. But it works, and the solution is quite simple and brilliant in my opinion, so I thought I could share it so others may benefit from it.
{% youtube GYO14ioZ4Rw %}
What you need:
- ESP8266 board (I use the NodeMCU; it's very cheap (5$) and it does the job)
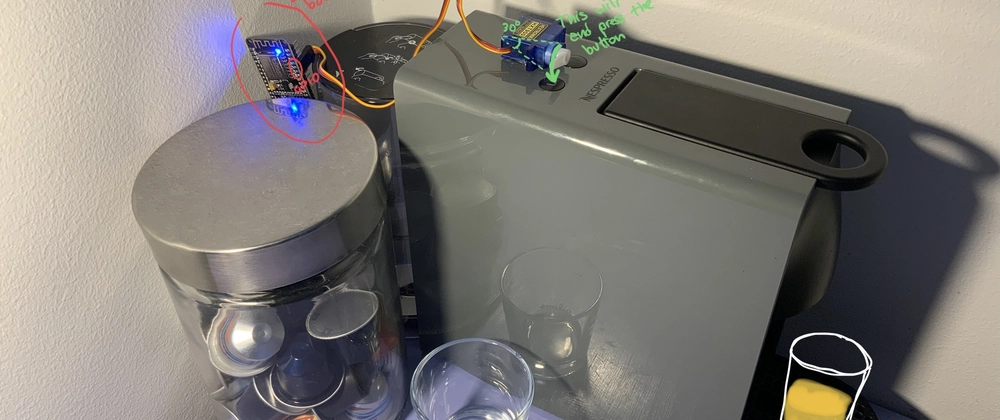
- A cheap servo motor (I use cheaps HXT900)
In theory, this is all you need; you could just write a simple sketch that will turn the motor at 8 AM and press the button.
I soon realized though that to make the most of it, your coffee shouldn’t be made every day (there could be days when you aren’t at home) and it shouldn’t be made every day at the same time (I don’t know about you, but I don’t wake up every day at the same time, and also 5m could make the difference between a hot coffee vs a cold one).
In my case, I every day end up drinking the coffee as soon I stop my alarm; that’s the moment when the button should be pressed; in order to do that, we can take advantage of some of the recent automation that Apple put in the latest iOS. I’m quite sure there is a similar concept in Android, but since I own an iPhone I’ll describe the procedure for this one.
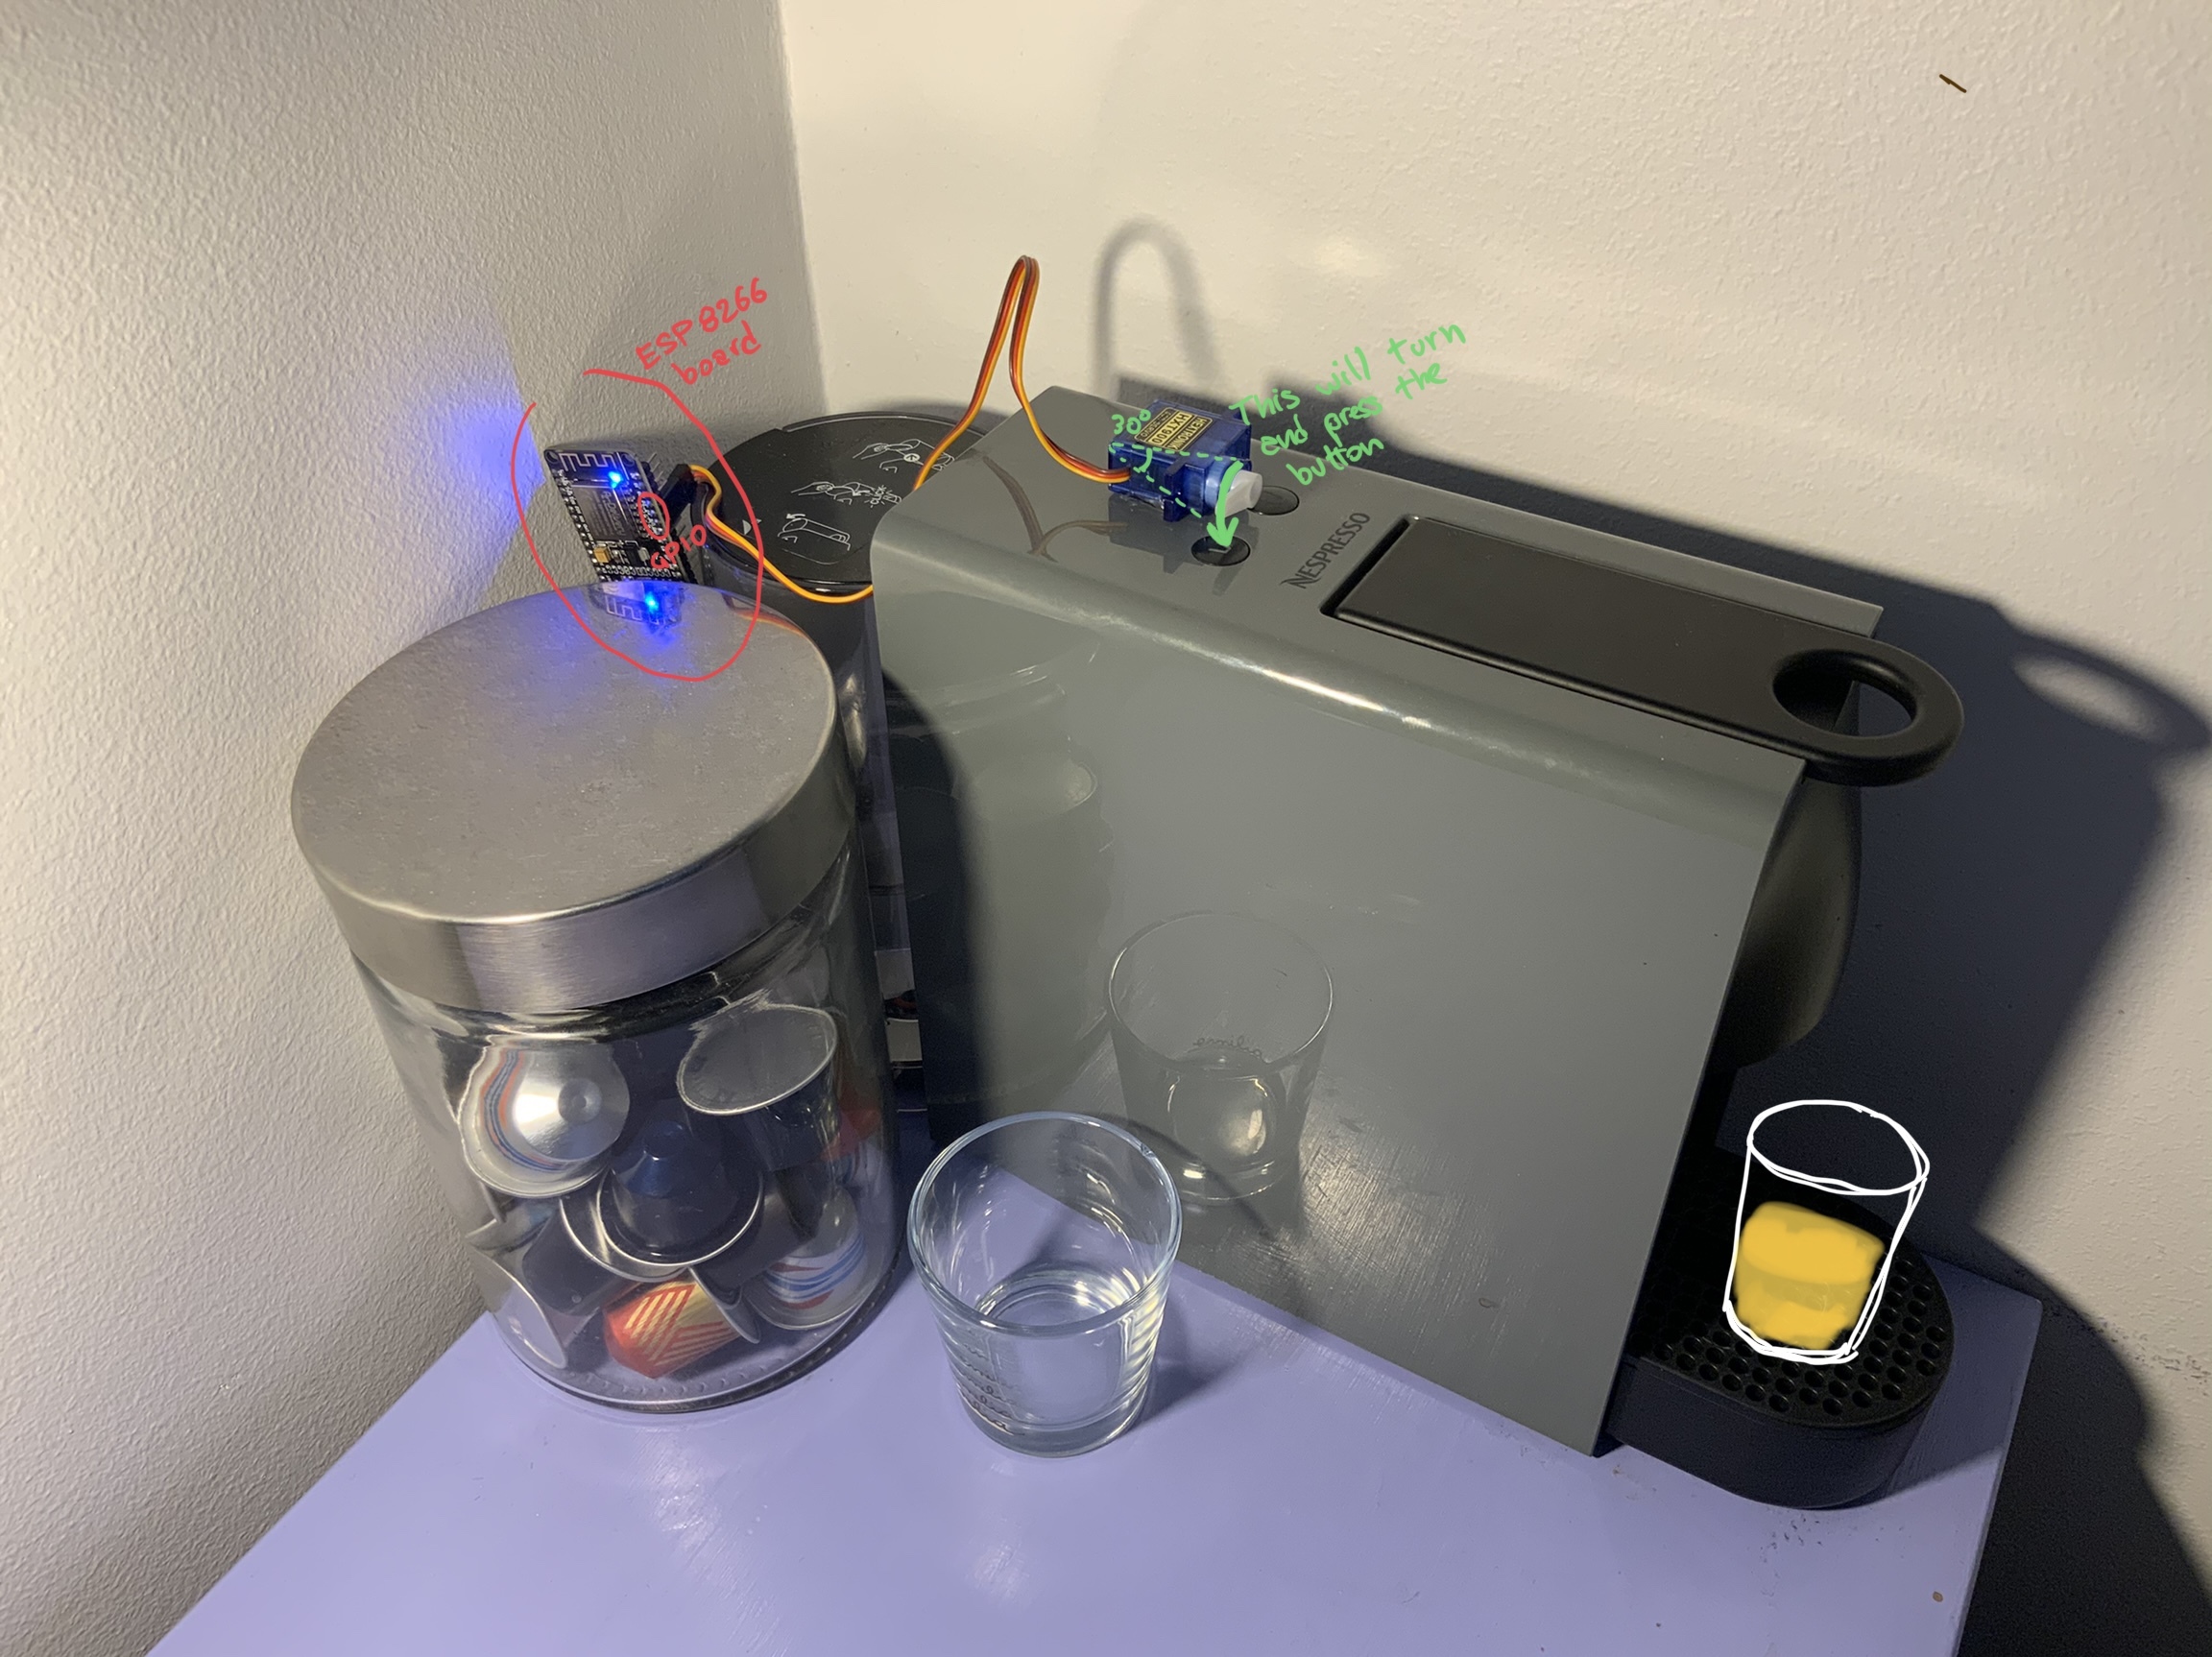
Connect the servo
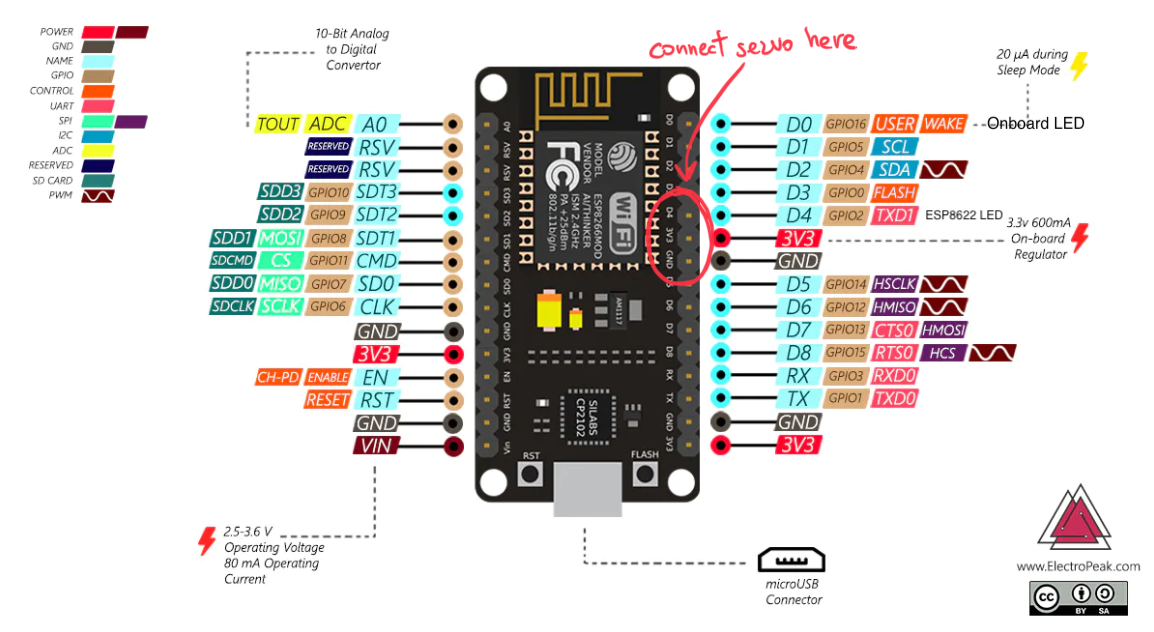
That's pretty straightforward; your servo motor should have 3 pins: 3V, GROUND, and the controller pin.
Connect these to your board, choose the controller pin and write it down; if you have a NodeMCU and the HXT900, you can use this schema:
Download the sketch and flash it
Download this sketch: https://github.com/kopiro/arduino/blob/main/Projects/ButtonPresser/ButtonPresser.ino to your workstation and open it.
I'm not gonna cover here how to configure your workstation on how to build Arduino sketches or how to install ESP8266 drivers, as you can find all resources here.
Before flashing it, you should modify the sketch and set WIFI_ENABLED to 1, WIFI_SSID and WIFI_PASS to reflect your network configuration, so that the board is able to connect to it.
Also, make sure you set the MDNS_ENABLED to 1, and MDNS_NAME to something that makes sense for you; this is how you can reach your board in your network without dealing with static DHCP IP allocation on your router.
Make sure you also change the SERVO_GPIO to be the GPIO number where you have connected your servo controller pin.
If you want to make sure you can update the board via OTA (over-the-air; without connecting the board via USB to the workstation), please also set OTA_ENABLED to 1 and set the OTA_PASS to something unique.
Once you have flashed your board, it should be accessible via the MDNS_NAME you choose in your browser.
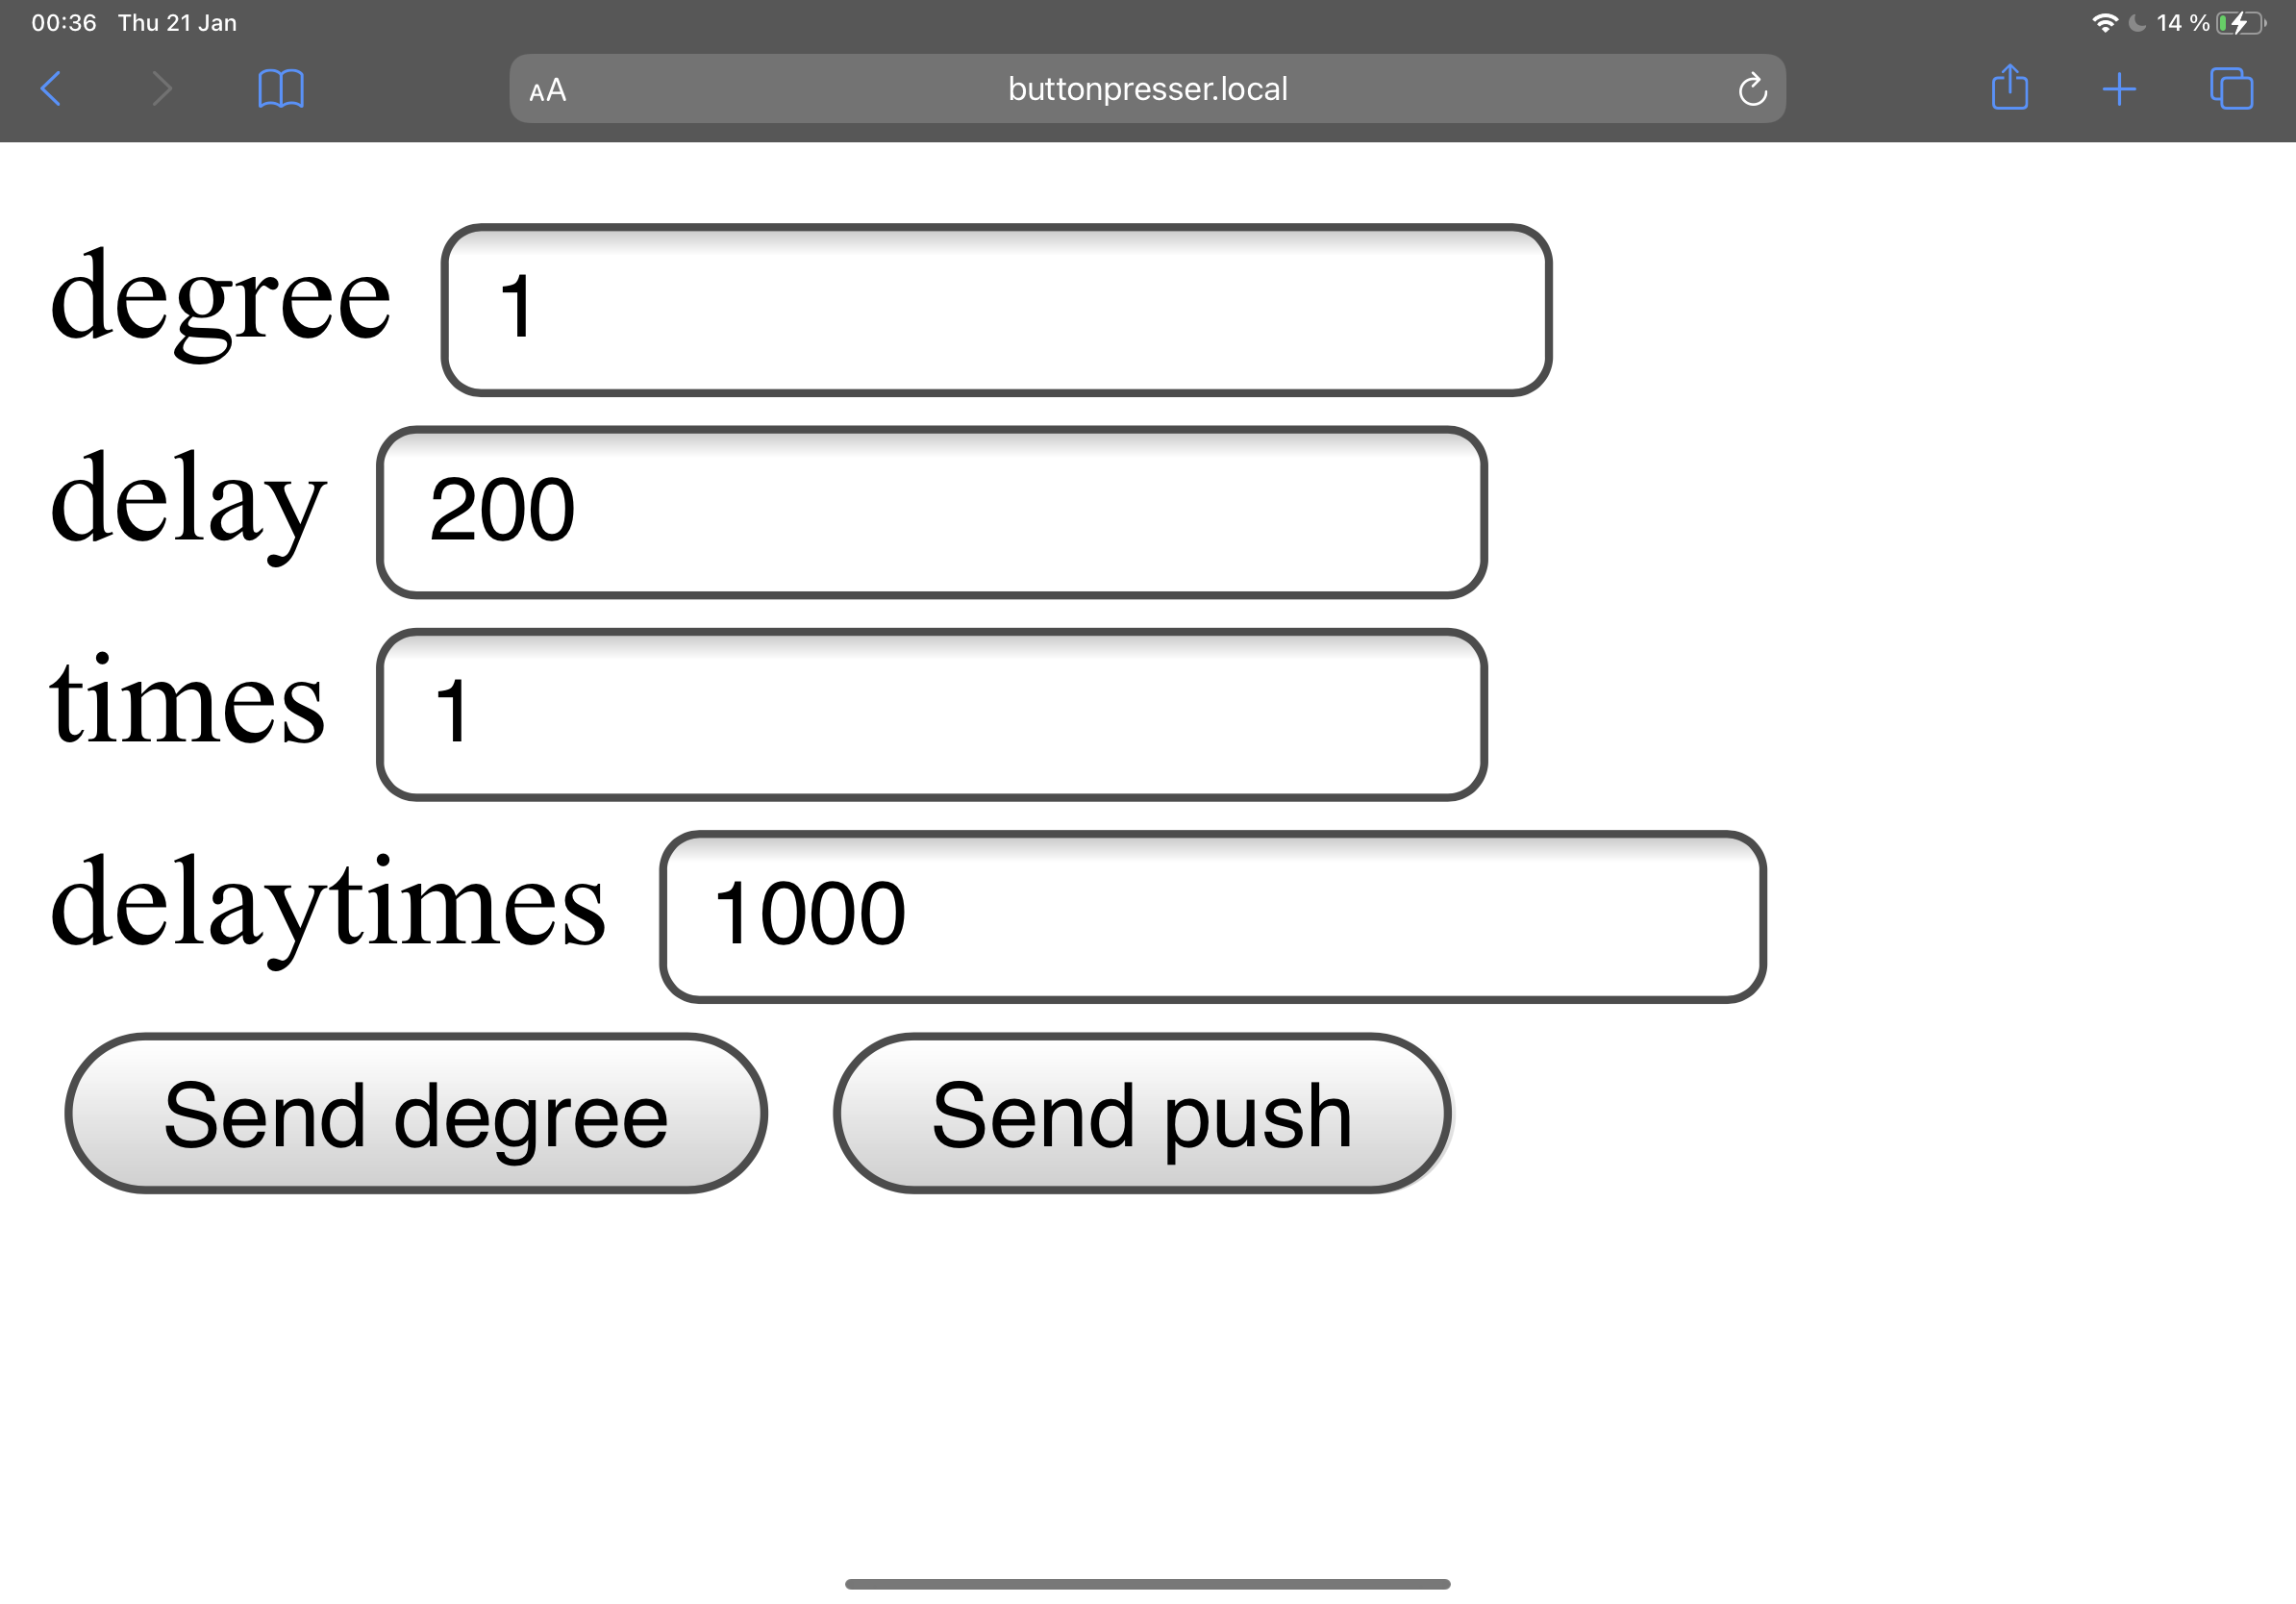
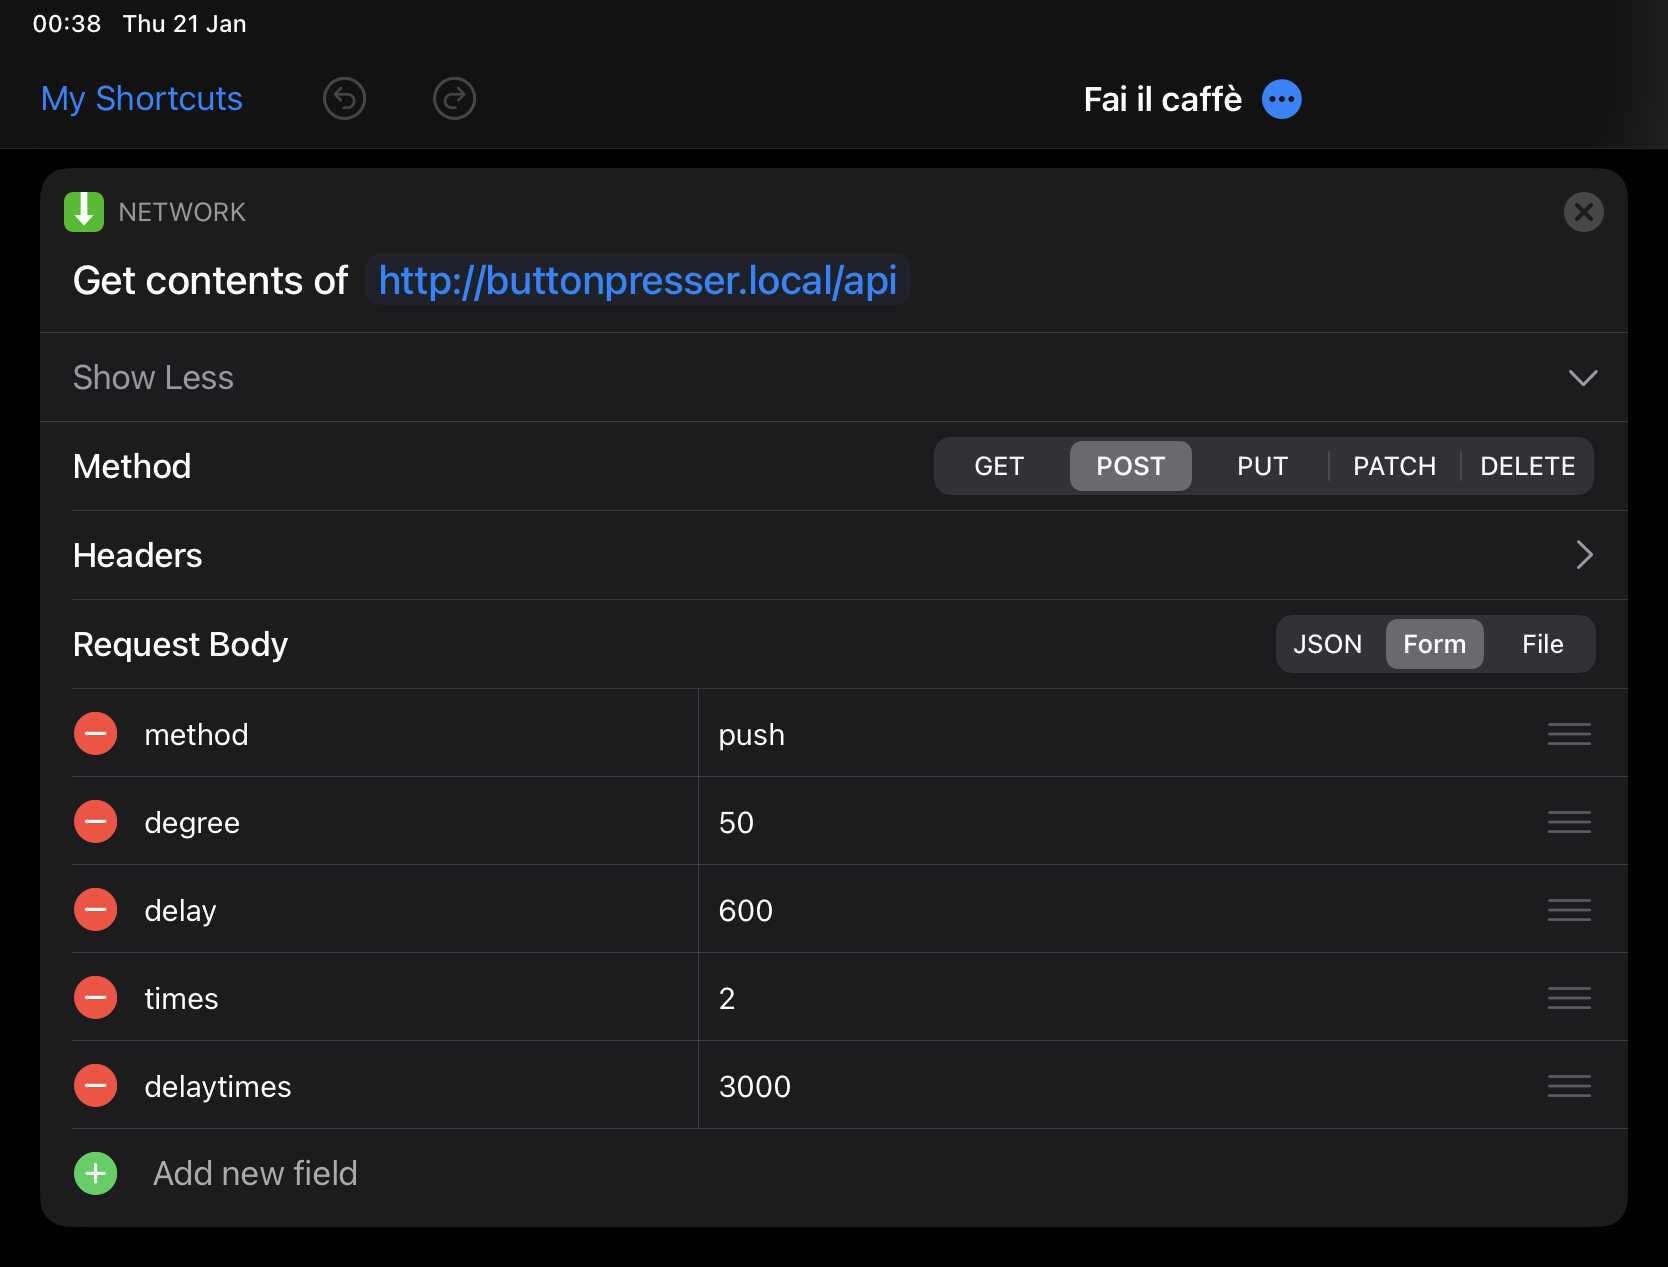
This is a simple dashboard where you can play with the software to choose the right values based on your coffee machine, on how long, how far, and how many times the button should be pressed.
Specifically:
degreeis a numeric value representing how many degrees the servo should turn. If you have put the button at 0 degree, something between 20 and 45 should do the job to press a button.delayis the number of milliseconds the board should wait before lifting the servo back and turning it again to0timesis how many times this “push” button operation should be repeated. This is quite useful in my case because I have to press once to switch on the coffee machine and twice to actually pour the coffee.delaytimesis the number of milliseconds to wait between every “push” button operation
Play with these values until you are sure that the coffee machine is able to press the button properly, and store them for later.
What the sketch is really doing
Nothing fancy, actually.
It's simple exposing an HTTP server with a POST method called /api that accepts those parameters you played with before; when you hit this endpoint, it will simply turn the servo by the degree parameter specified.
const String method = server.arg("method");
int _degree = server.arg("degree").toInt();
int _delay = server.arg("delay").toInt();
int _times = server.arg("times").toInt();
int _delaytimes = server.arg("delaytimes").toInt();

if (method.equals("push")) {
  if (!_degree) _degree = 45;
  if (!_delay) _delay = 200;
  if (!_times) _times = 1;
  if (!_delaytimes) _delaytimes = 1000;

  for (int i = 0; i < _times; i++) {
    myservo.write(_degree);
    delay(_delay);
    myservo.write(0);
    if ((i + 1) != _times) {
      delay(_delaytimes);
    }
  }

  server.send(200, "text/plain", "OK");
  return;
}
If you make a request using cURL to that endpoint, you can test from your terminal:
curl http://buttonpresser.local/api -X POST --data "method=push°ree=20×=2"Make coffee every morning after you have stopped your alarm
This is the simplest and funniest part; we’re gonna just take advantage of the “Shortcut” app already available on your iOS device.
Create a new shortcut with the action of ”Get Contents of URL” and put these values:
You can now test this shortcut by saying to Siri, or just by pressing the button.
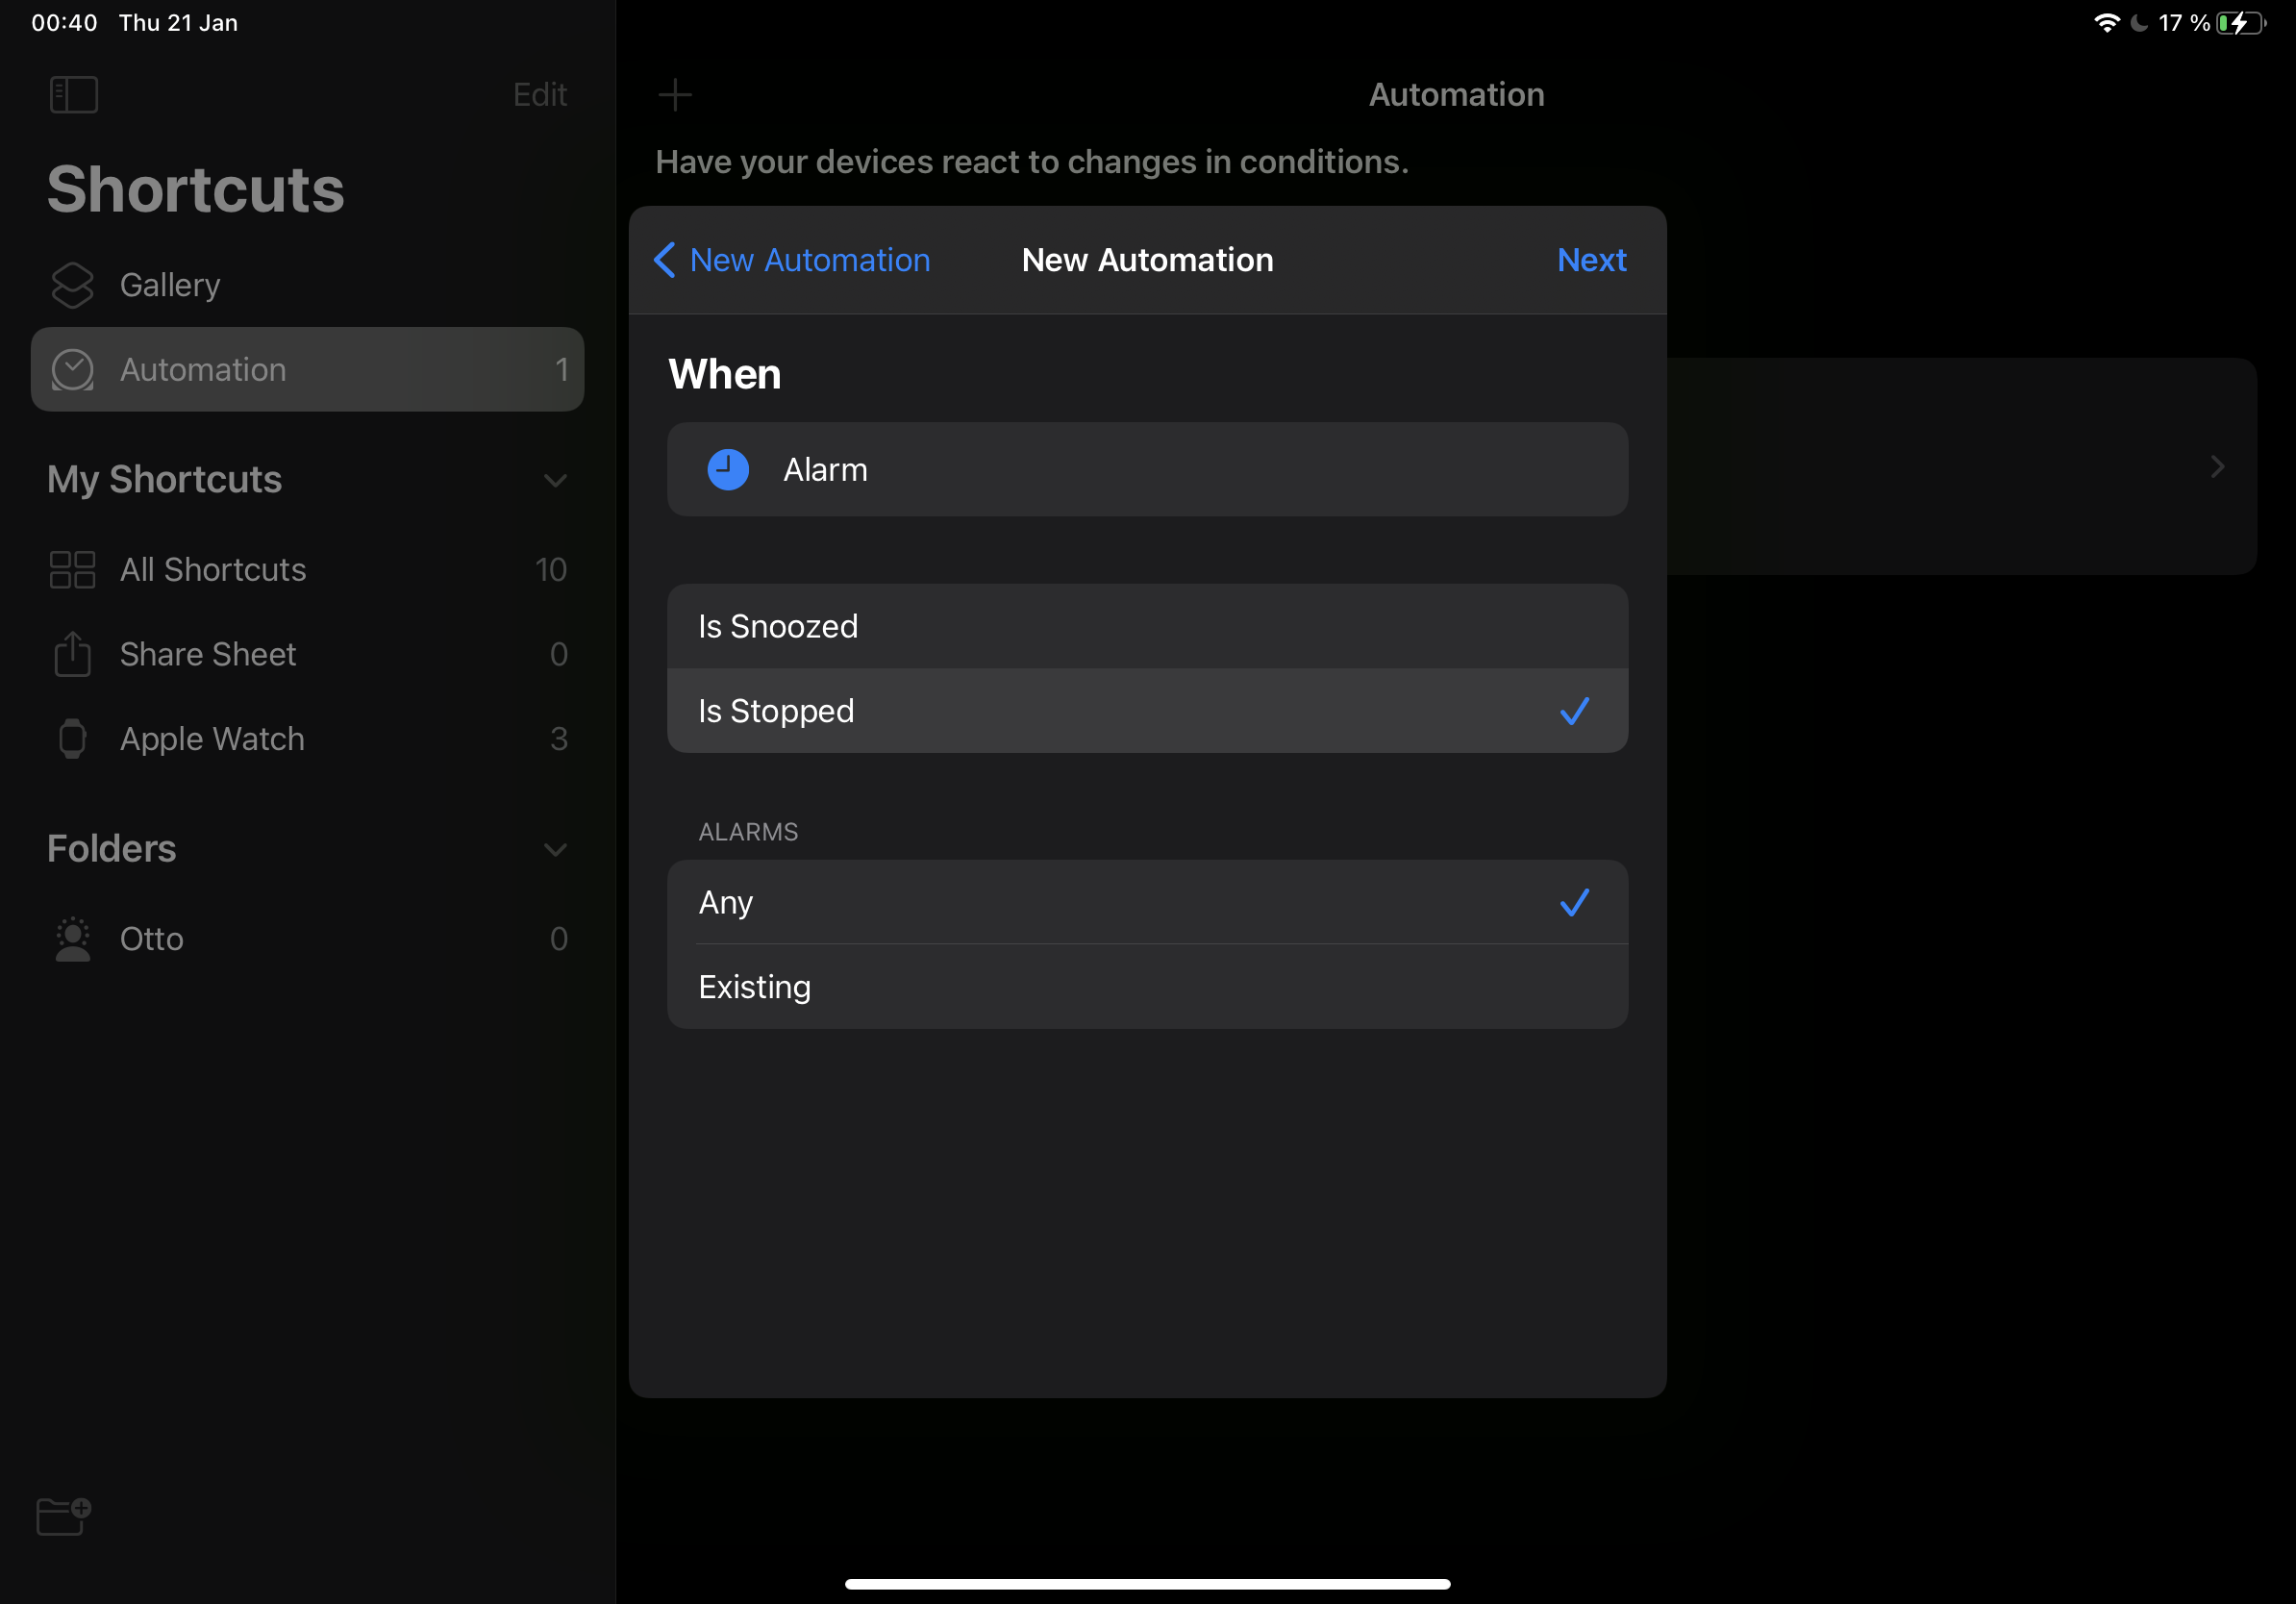
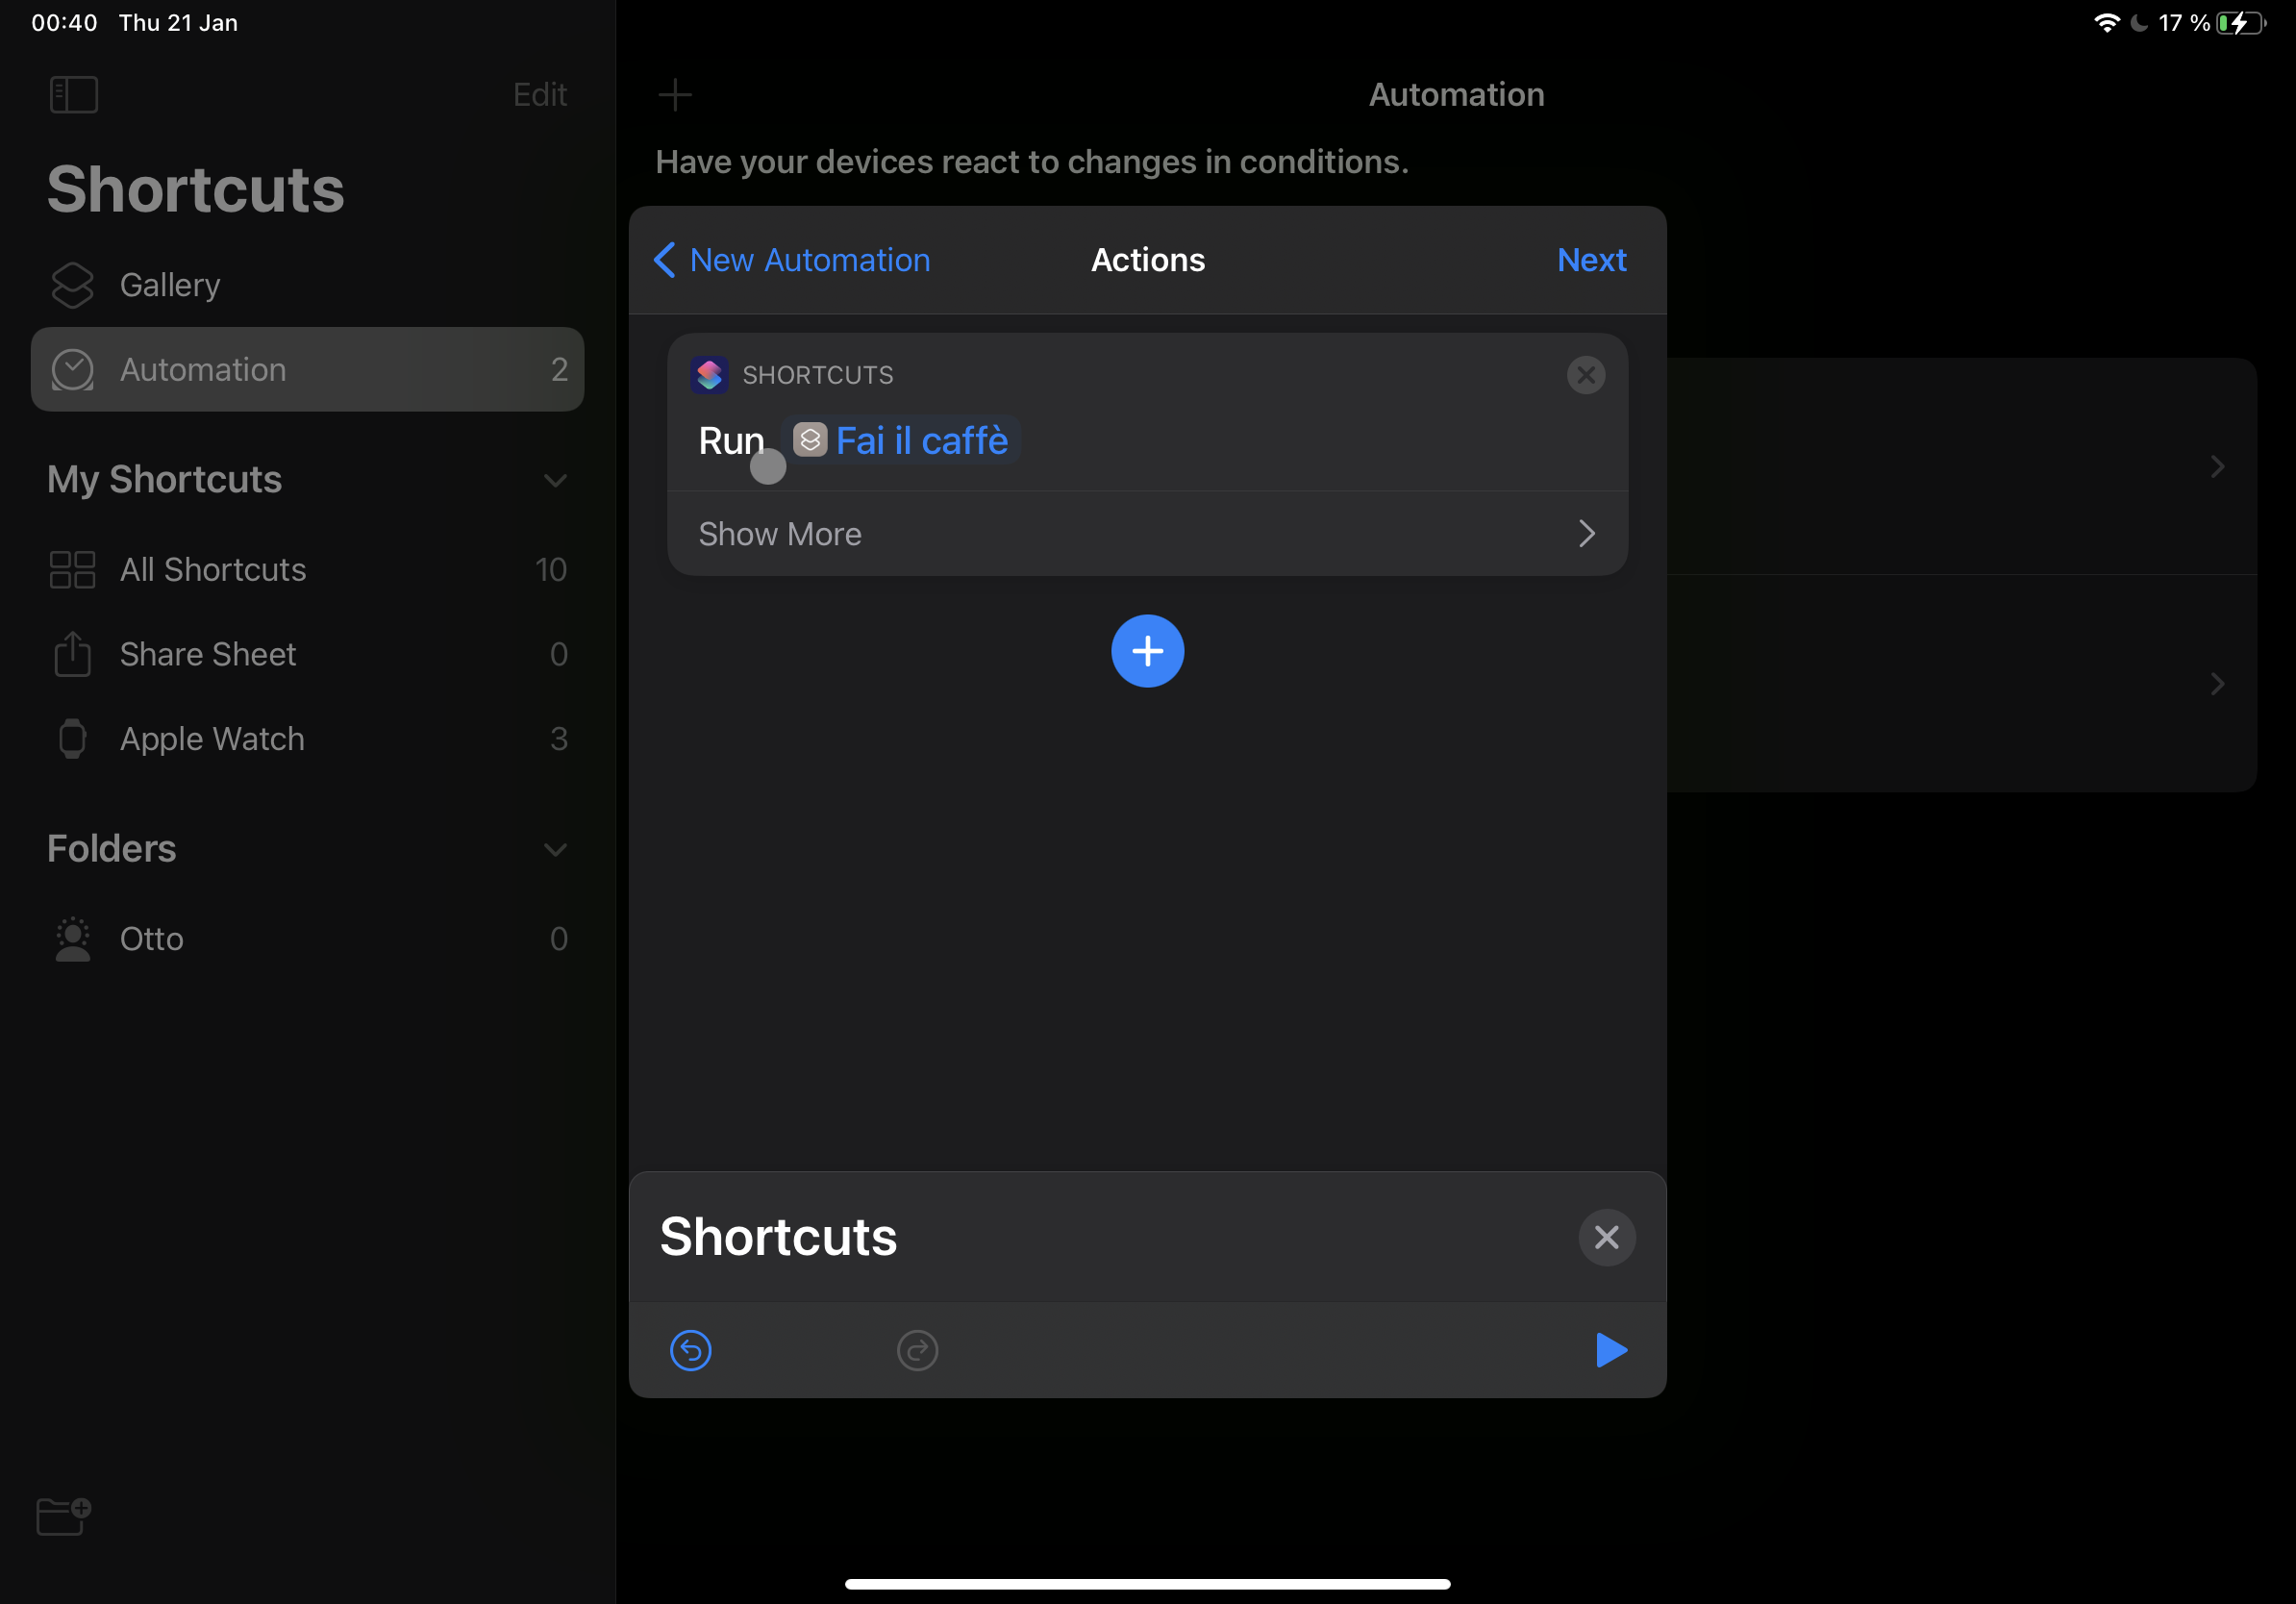
How to do the automation though?
That’s even simpler, go to the Automation tab, and select When my alarm has stopped > Run shortcut and select the shortcut you’ve previously created!

That’s all, for real… Happy morning coffee!
{% twitter 1350822814857777157 %}